Sisters with Flair

Wednesday, June 30, 2010

Boredom Buster- mini picasso's

I wonder if you can get scholarships in paper tearing? My girls would totally rock that degree! I decided to put their paper tearing skills to use and have them make a piece of art with their bits of paper instead of a bigger recycling pile. 8 yr old M is really creative and drew the design she wanted on a 24"x24" piece of very thin wood. We painted it cream with craft paint and it became her blank canvas. She wanted it to go in her bedroom so we used paper that coordinated with her bedding. Both my girls got into the paper tearing and we created piles based on the color of paper. Then we painted on modge podge in small areas over our penciled drawing and added the torn paper, making sure it overlapped each other.
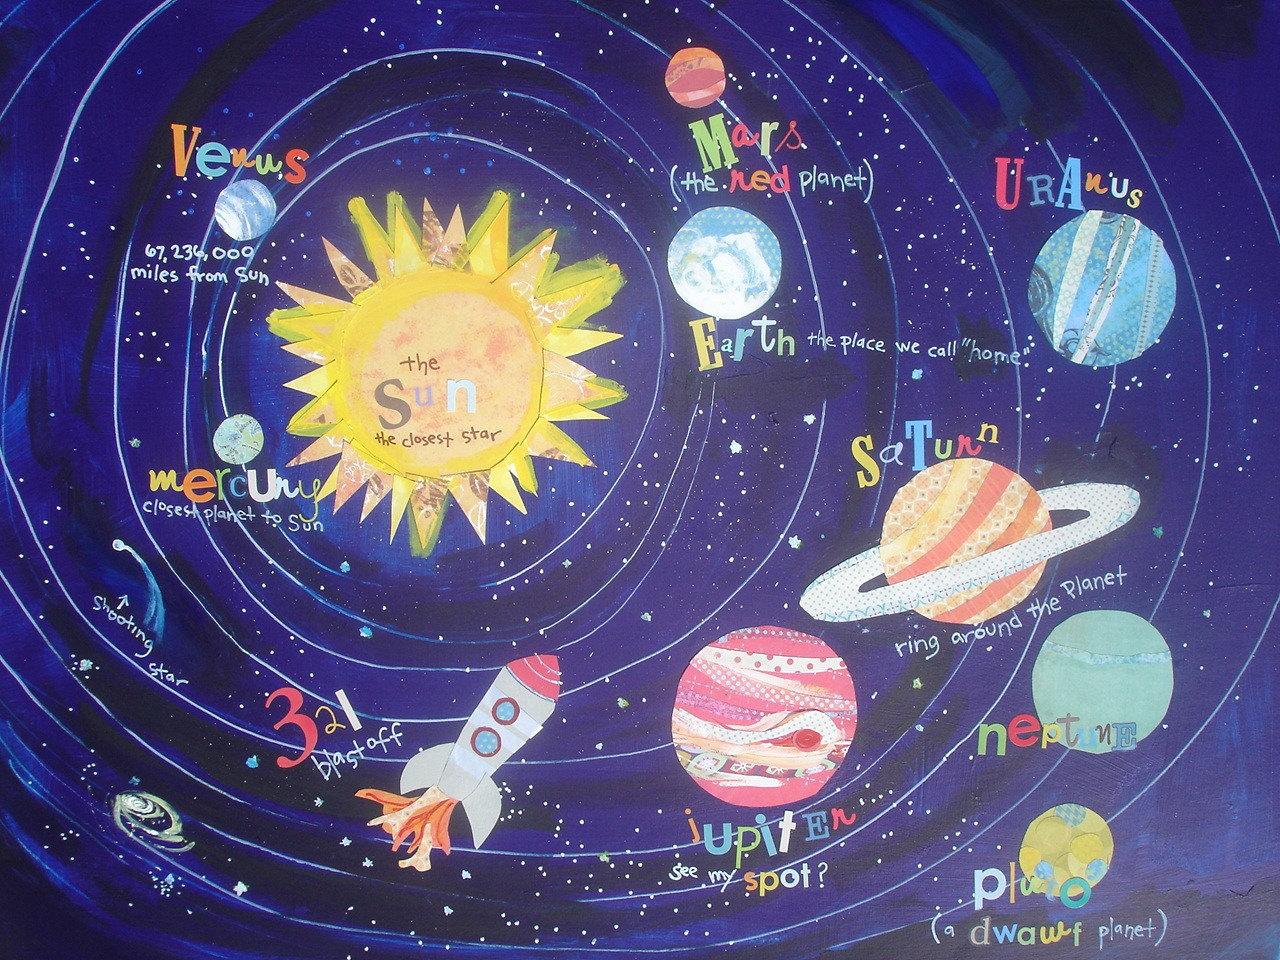
The finished piece of art, still needs to be hung in her bedroom but you get the idea. What I love most about this project is that she & lil sis created this all on their own with very little supervision. They couldn't be prouder of themselves & I love that this project kept them busy for over 2 hours!


Tuesday, June 29, 2010

How to Make Hanging Bells to "Bell Train Your Dog"


It's summertime and my kids are bored. How do I know? Let's just say my 7 year old watched me cutting up strawberries and told me the way I was cutting them up was "fascinating" "seriously? fascinating?" I said. "Yes," he replied, "this is the most interesting thing I've done all day."

So of course I decided we'd better find a useful craft project...

Over the past couple of months several of my friends have adopted dog's and all of them have been talking about this bell training method. Jack doesn't bark to let us know he needs go out, he moves the wood shutters up and down to let us know he needs a potty break. Unfortunately, this doesn't bode well for for the one shutter he scratches to make his needs known. I thought the bells might be a better idea and set out to make some. Since I couldn't find any kind of tutorial I pretty much made this up with the help of the two little boys and a couple of easy to find craft supplies.

Supplies:
Ribbon (I used about 42")
Bells
Snaps (and snap attacher)
Split rings

I first measured down approximately 11" and then folded the end of the ribbon up 1/2" to hide the raw edge. Next, I folded the ribbon down approximately 5" to make a loop to hang over the door knob. I then secured the folded end with a pearl snap to secure the door loop. This will use your first 11" of ribbon. Next, I measured down approximately about 11 inches and created a snap loop to add my first set of bells. The bells consisted of a split ring attached to two bells to help give it more "jingle." Lastly, I hung the ribbon from the door and figured out about how long I needed to make it so Jack could ring it easily. Then I attached another set of snaps to make the loop on the end and attached the last set of bells so they could easily be rung.

Honestly, this is the hard way to do it. Trying to figure out which way each set of snaps needs to be attached so they're all facing the right way takes a little bit of thinking (not much, just a little). While this may add an additional 4 minutes that it takes to make this it is worth the time because the bells can be removed and the ribbon can be washed. The alternative to adding snaps would be to simply add the split ring and then stitch it closed.

Total cost was approximately $4 which included leftover split rings and two bells. Total time, about 12 minutes. The majority of the time was spent deciding on ribbon.

Here's a picture of Jack. He's very apprehensive of the bells (then again, he's afraid of rain, lightening, rabbits, other dogs...) Since he's a quick learner, especially with treats around, we hope it won't take long until he's using the bell instead of my shutters.

Monday, June 28, 2010

Painting the Solar System

I've always had aspirations to be a great artist. However, sometimes what you hope to be and what you actually are are two different things. I've decided when we're ready to put my little man into a big boy bed that I'll redecorate his room in a space theme. We're not quite ready to give up the comforts of the crib yet, so I'm taking a slow pace at getting the decorations together. I've been looking online for some inspiration when I found this art piece on etsy. Amazing! I just absolutely love it. But I wasn't quite as in love with the price tag when I figure I can make something "just like it" at home.

Etsy's version


Enter the finished solar system. Three weeks of off and on crafting landed me with this puppy. Not quite as spectacular as the etsy find, but I think I'll still stick it up in his new room. Hopefully those wobbley orbit lines won't drive me batty. Click on it to view larger.


My version


Here's how I made it, in case you're curious. I took a 16x20 canvas board ($5) and layered on the navy blue acrylic paint. I used a brush at first, but I was going for a real swirly effect, so I was eventually finger painting. After that dried, I dotted on some white spots for starts. I was trying to use the splatter method I remember doing in 4th grade, but after a few mess-ups, I went back to painting them by hand. The hardest part of this project was choosing the scrapbook paper. I used quite a few scraps I had laying around. To apply, I just mod podged them on. The swirls were obviously my nemesis here, which I hand painted on. Should've used a paint pen or something, but I got impatient towards the end. I searched around a lot for multi-colored, multi-sized alphabet letters, and I actually found these at walmart for a dollar. Score. So instead of paying $156 for the etsy version, I paid around $8 for my homemade, slightly smaller version. Hubby should be proud.

Sunday, June 27, 2010

Bedroom Bling

I love parties. I especially love the decor of parties. The puff balls hanging from the ceiling, crepe paper stringing from one wall to the next. It's just fun & happy. That's what I wanted my M's room to look like. She's just like me, all about the party! So I made this very simple banner to hang in her room. And when I say simple, I mean easy peazy! Here's what I did:
Step one. Fabric- I bought 4 different fabrics each 1/3 of a yard. This is enough to make 2 banners, but you need the length so 1/3 is the smallest I could buy for my banner to be the size I wanted. I made each triangle 12" wide at the top and 13" in length. After I had one cut out I layed it on top of the fabric and used my rotary cutter to cut the next one. I cut 3 triangles in each fabric, but only used 10 for my final banner.

I don't have a picture of this next step but I used grosgrain ribbon and sewed the triangles onto the grosgrain using matching hotpink thread. I think hot glue or fabric glue would work just as well though. I didn't back the fabric or anything. Unless its backlit by a window, it's not necessary. Here's my finished banner- and let me just say she loves it!
The cost of the project was $8.10 for 1.3 yards of fabric and 5yrds of grosgrain ribbon. It only took around 30 minutes to make & I can't wait to make more for my other two kids. I think this would be great for baby showers & birthday parties too. So easy & fun!

Friday, June 25, 2010

Rollin' Rollin' Rollin'... Crayon Roll


Ok, I'll admit that my son does NOT like to color, but I've been dying to make a crayon roll forever. Like at least a year. I kept thinking that it looked really hard, so I've never tried. Then I saw this tutorial and realized how super-easy it could be with the right tutorial.(I couldn't get a direct link to the crayon roll tutorial, but just go to her blog, then click on her tutorials, scroll down and you'll see it. I whipped this puppy out in no time. Maybe I'll get super-ambitious and make them for all the nieces and nephews for Christmas this year. Maybe I shouldn't put that in writing... Anyway, go make one yourself and be proud of your super-organized crayons in the bottom of your purse!

Monday, June 21, 2010

Celebrity Encounter

Yep, almost killed my computer yesterday. Those virus people are getting better at their "jobs." Thankfully I stopped it before any permanent damage was done. Whew!
Due to Father's Day weekend, I didn't have much time to fit in any crafts to show you, but I thought I'd show you my latest "celebrity" encounter. In the tiny little college town we live in, we rarely have anyone famous come. So when David Archuleta came last week- BIG deal. I was a big fan of his during his season of American Idol a couple years ago, and it turns out he hasn't changed much since. He's still super awkward when he's talking to the audience, but when he sings- wowza, what a voice. A couple days before the concert, an old friend and I decided to go to his book signing. We waited 2 1/2 hours in the blowing cold wind to get his autograph, but it was totally worth it to act like teenagers for an afternoon. We made friends with all the 13 year olds around us and had a great time! Here are some pictures from the two events. Sorry, they're a little out of order.

Here I am getting my book signed by David. I must be hilarious because he managed a bit of a smile on my behalf.

I had to "use the restroom" while standing in line, and he was in the bookstore doing interviews for the local tv stations.

Here we are waiting in the wind. I didn't realize how cold it would be, so I used a baby blanket to keep warm!

Here he is at the concert.

Here's a picture the hubs took of me while I was jamming out to "Crush." SUPER fun night!

Sunday, June 20, 2010

Baby's Room Finale

So we just finished K's room and I'm so excited to be done with it. It's just in time for his 20 month birthday! Pathetic, I know! We cleaned out our craft room and turned it into a nursery right before K was born. With all the painting and "organizing" (aka: shoving all my crafts into 4 different closets) and being 9 months prego- I was exhausted! His room went neglected and unfinished for 19 months. I figured we better hurry and hang everything up before we move him into a real bed and I want to change his decor. I've invisioned this wall of K's for 2 years now. In my mind, it's filled with all sorts of colorful industrial letters found at various flea markets and antique stores. Did you know that the letter K is VERY popular? Well it is- every time I find a vendor who has some vintage store signs- they ALWAYS tell me that they don't have any, and probably WON'T have any. Depressing huh? So here's my make-shift letter K wall. Not quite what I invisioned but I'm pretty sure my son won't care. I've collected as many paper mache and wood K's as I could and modge-podged paper over them. Then, my sister made some vinyl letter k's for me to fill in the empty space. Eventually, I want to find better K's and add to the wall, so for now, it's a work in progress. My husband insisted on making my son a mobile of airplanes before he was born. When I brought home the airplane crib bedding my husband got very excited about the thought of this mobile. I think it finally dawned on him that there would be something more to his life than tutu's, nail polish and purses! I know my baby is awake from his nap when I hear him make the sound of airplanes flying- so cute! Welcome to your finished bedroom K- I'm sure you will grow up to appreciate all the work this entailed and really appreciate the fact I gave up my craft room for you (insert sarcasm). But, you are worth it!
(picture above) This is the wall of K's- a work in progress!

The dresser I just had to buy when I was pregnant with my first child- because I thought for sure I was having a boy! I only had to hold on to it for 8 years!
The mobile my hubs made when he found out I was doing an airplane room.

Thursday, June 17, 2010

Homemade Peanut Butter Cups


Mmmmm... so I made these last night and "accidentily" made the whole batch (I usually just make a half batch so I don't end up eating the whole thing myself). Not so proud to admit that we've eaten about half the pan of these babies. I guess we just take the healthy route in life around here. Anyway, here's the awful recipe that you'll love (and hate because you won't be able to stop eating them).
Homemade peanut butter cups
12 graham crackers ground up (I just pulverized them in the food processor)
1 cup of butter, softened
1 cup peanut butter
3 1/2 cups powdered sugar
Mix all these ingredients really well in a bowl. Then press into a 9x13 pan. Then add
12 oz. melted milk chocolate chips and spread evenly over the peanut butter mixture.
Good luck with these babies. Try to make these when you have some self control(unlike me)!

Tuesday, June 15, 2010

More Father's Day ideas

So, I'm still stuck on what to get my dad & hubs for father's day so I decided to check out my favorite site for inspiration. Here are some things that I found on www.etsy.com that would be perfect for my dad & hubs. My husband actually made his own pair of these stainless steel collar stays. I had no idea what these were until I saw him torching a spoon & then hammering flat and ground it into the shape and size he wanted. Basically he's MacGyver, and you should just order a pair. Plus you can engrave them!
Have you noticed that most of men's dress shirts in the stores are all cuff linky. Why not get him some funky cuff links. They sell cool lego ones too- even star wars lego cuff links. Just do a search on www.etsy.com. So many fun ones!

So my hubs thought this ipad would be a perfect mother's day gift for me. He was wrong. So this is HIS Father's day gift. I found this cool docking station made from a log to hide those ugly wires!

How cute would this be to show up for church on Father's Day with a Daddy/Son matching tie set! EEEEK! All the baby boys would be jealous and would say, if they could, "MOM! Why don't I match DAD? NOT FAIR!"

So I saved the best for last. This is for the chocolate/ bacon lovers out there. I've often thought to myself, "hmmm, which do I love more? Bacon or chocolate? But I love both of them SO SO MUCH, my life would have no meaning if one of them were missing!" Thank goodness I don't have to choose anymore- I can have both. AT THE SAME TIME! That's right- if you really love your man, buy him chocolate covered bacon and check it off his bucket list. He can die happy after he's eaten this stuff. All brought to you by www.etsy.com. Happy father's day hunting!


Monday, June 14, 2010

Toddler Pillowcase

I've noticed my little 21 month old has been sleeping with his head on top of his stuffed animals lately (creating lovely marks on his face when he wakes up:) So I decided it's time this kid get a little pillow. I wanted to make a pocket-type pillowcase so the pillow will stay inside. Here's my tutorial on how I did it!:)

I had this pillow that had been on my couch but looks like someone had spilled some mac and cheese on it. It was a pillow that I had handstuffed and then handstitched closed, so I wasn't sure what to do with it. It's just the right amount of support for a small little head, so away I went.

I cut a piece of fabric for the center, using the pillow as my guide. I wanted some of the coordinating fabric to show on both sides, so I cut it smaller.

For the rest of the pillowcase, I used my pillow as a guide and overlapped the fabric, so there pillow will stay in its case. After that, I cut the long piece in half(like a hamburger).

Here are the three pieces of the pillow. Just sew a straight stitch to sew the pieces into a long strip.

Here's what it'll look like.

Then, on each end, I folded the edge over twice, ironed it flat, and then sewed it down. This way the edge will look nice and not fray. Make sure to do it on both sides.

Then I folded in one side of the strip, like so. I used my pillow as the guide to decide where to fold.

Then I folded in the other side and pinned it closed. Now I'm ready to sew it all together!

Here's what it'll look like sewn together. Just clip the corners, making sure not to cut your thread! Flip it right side out, stick in your pillow, and voila! You're done!

Here's the backside.

And here's the front. Too bad he's already down for his nap, I'm ready to see if he likes it!

Sunday, June 13, 2010

book review: the wednesday letters

I'm kind of obsessed with letters. Especially love letters. This book inspired me to continue my love for love! The husband, on his wedding night, writes his first love letter to his wife. He promises that every wednesday for the rest of their lives he will write his bride a love letter. When the couple passes away the children find boxes and boxes of these love letters that they never knew existed. They were able to learn quite a bit about life, love and forgiveness through these beautiful love letters. It was a quick read but has been on my mind for the last week. What will my children remember of me when they've grown up? Will they know how much their parents loved each other? Will they know how much we happily sacrificed for them? What will my legacy be? I want to fill boxes and boxes of love letters over the next 50 years and I think I'll start today! It will be my sunday love letters. Read it when you get a second & maybe you'll be converted to pulling out a pen & paper instead of your only letter being a text messaged grocery list. Not that I do that or anything!

Friday, June 11, 2010

How to fold a shirt


Thanks to Paul, my 16 year old son has learned to do this with a single dollar bill. Here’s the link found from Paul’s photo on flickr so you can see how it’s done. Youtube Video Instructions
Meanwhile, this is his pile of clean tee-shirts. I literally walked into his room and snapped the photo exactly as I found it.
That got me thinking about how long it really should take to fold a shirt and of course I decided to google it. Did you know you can learn to fold a shirt in 2 seconds? This is amazingly easy once you watch the how to video How To Fold a T-shirt in 2 seconds. Of course, for all of you that use “folding laundry” as your excuse to watch trashy tv then this may not be the skill you want to learn. Meanwhile, I’m thinking of all the time that can be saved since 6 people x 7 days =42 shirts. 42 shirts x 2 seconds each = 84 seconds, if I round up that’s only 1.5 minutes to fold all the tee-shirts for a week. Just a thought…

I'm sure one day I'll miss the pile of shirts on his floor, right now it's kind of difficult. At least I can take consolation knowing he's perfectly capable of folding a shirt (and an elaborate one at that) IF he wants to.

Thursday, June 10, 2010

Father's Day Ideas

I've been on the hunt for cute father's day gift ideas (because the fathers in my life REALLY care about getting a cute gift;) Here's a couple that I'm in the process of working on. Love this pop bottle filled with candy I found here!

Or how about a Super Hero kit?! What a stinkin' cute idea! They have the files all ready to download- so simple, but so cute! Have I said cute enough? I guess I need a new word. Idea found here!

Alrighty, here's where I'm at a stand still. I love making tshirts using vinyl as a stencil and filling in with Tulip brand permanent fabric paint. So fun to personalize. I've been looking for cute Father's Day t shirts, but I've come to the conclusion that perhaps they don't exist. Anyway, still hunting for some ideas, but here's a few shirts I've made in the past for my baby boy.


Hubby LOVES his beard, he's pretty devoted to that dang thing. I mean, look at how happy he is with that beard!! I found this saying and made this shirt for him last year. He wears it with pride! But I know he would NOT wear a #1 Dad t shirt with pride. Any ideas for me??

Wednesday, June 9, 2010

Summer Snowcones!


“The devil calls up his travel agent and says, ‘I’d like to go somewhere hot this summer.’ The travel agent says, ‘Have you ever been to Dallas in July?’ The devil answers, ‘It’s a vacation, not work.’”

We live in just north of Dallas and I can attest that the heat here can get downright nasty. Thank goodness for cool things…like air conditioners, swimming pools, libraries, and snow cones. Around here we have the famous Snowcone Lady who has been selling her delectable creations of yummy coolness for over 20years. One of my favorites is “Honeymooners Delight,” a mix of mango, guava, and real cream. Yes, she uses real cream in her snowcones, upon request.

A trip to The Snowcone lady isn’t always feasible so in its place we’ll often make our own at home. Sometimes Target runs out of our favorite flavors so last week I happened upon a recipe to make your own snowcone syrup. Unfortunately you can’t make it sugar free, but the cost savings makes up for it. Besides, I grew up in a family where we NEVER watched our sugar intake…see this link for a glimmer of how we grew up http://sisterswithflair.blogspot.com/2010/05/window-flair.html

Several years ago I purchased a small snow cone machine from Pampered Chef and it’s been worth every penny. A similar version is available at Target and I’m sure other places as well.

Ingredients:
2 Cups Sugar
1 Cup Water
1 (0.13 ounce) package of unsweetened Kool-aid

Directions: In a saucepan, stir together the sugar and water. Bring to a boil, and boil for about 1 minute. Remove from heat, and stir in the drink mix. Allow to cool, and store in a container for pouring. Pour over shaved ice to flavor.
Another alternative is to omit the Kool-aid and add vanilla or amaretto (yum) flavor exract according to strength.

Tuesday, June 8, 2010

Bedroom Makeover: Phase 1

So here's the deal- I've been married 13.5 years. We have owned this furniture for 12 years, which is a start. But, we have never painted our master bedroom, hung a single picture or even had drapes in any of the homes we've been in. It's down right pathetic, I know. There is always another room that needs something & since this room is rarely seen by anyone but my family, it has been put on the back burner for far too long! I hate to spend alot of money though so you can see with a few small changes in color & a couple of accessories- this room went from blah to aaaah! It makes me so happy now when I walk in. I especially love the pictures above my bed that my 8 yr old took of me & my hubs. I don't like pictures of myself but I do love seeing pics of the two of us together especially with "daddy's sparkly eyes" as my 8 yr old daughter says.


So here's the skinny on where I got everything. I've been slowly buying for this room for the past 4 months. Paint: Sherwin Williams- Color is called Passive, eggshell 2 gallons $53 on sale. Paid Painters $130 for the trim too! Frames: Pottery Barn outlet, all 3 for $81. Matelasse blanket & 2 Euro pillows $60 at Marshalls. Pillows and throw from Home Goods for $50. Lamp $60 from Target, drapes from Target as well for $75 including the rod! The & sign was half off at Hobby Lobby and I painted it Teal for only $5. So the whole room only cost $514, but a major chunk was paying someone to paint it for us, so you could do it for even less. I'm not quite done with the room, this was only phase 1- I didn't show you the whole room because its not quite as pretty. Phase 2: I've got to figure out how to hide a 55" TV thats on a dresser & put up some more artwork above another dresser, & then I've got to recover my hubs grandfather's rocking chair and convince him to do it in a bold funky print. But for right now, I'll enjoy this small transformation. I'm on to another room! Here's a closer look at some of the accessories.

I've linked this post to this fabulous site: Thrifty Decor Chick