Sisters with Flair

Showing posts with label crafts. Show all posts

Friday, April 13, 2012

Chevron and Turquoise and Owls, Oh My!

It's times like this when I begin to wonder if I'm really related to my sisters..... How is it possible that they (and my mom) are sewing geniuses when I can't sew a straight line? I kid you not! I'm super awesome at using the ripper to unstitch every single thread that I've EVER sewn. Then I re-sew, then I re-rip it out, til there's very little fabric left that is unscathed. It's beyond ridiculous. I'm beginning to think that I'm allergic to sewing....

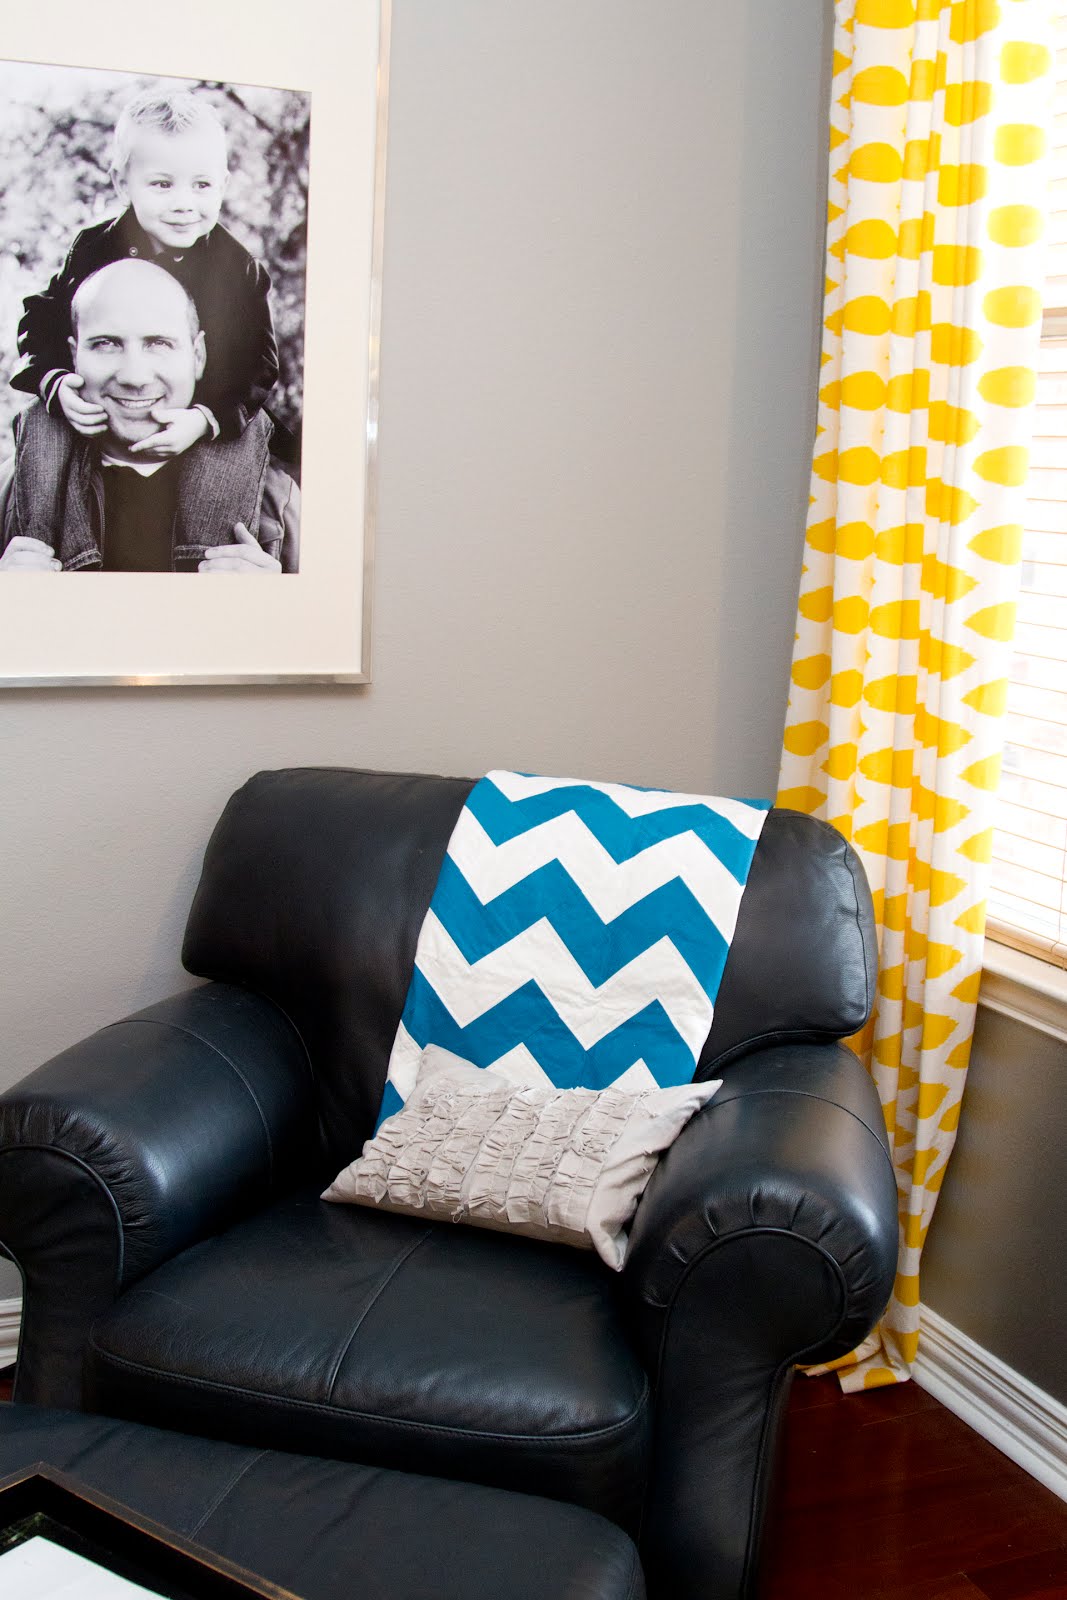
Fortunately, I have very generous sisters/mom who feel sorry for my pathetic skillz and make me super awesome/ insanely cool gifts. This happy package came in the mail today & I couldn't be more thrilled to receive such an outrageously fun gift from my lil' sista Mandy! Get ready for the pics peeps. Put down your diet cokes (so you don't choke with crazy excitement), steady yourselves (so you don't fall off your chairs) and hold on to your socks, cause I'm about to fill your screen with some chevron happiness!


Squeal! Doesn't this little corner just make you happy? Who knew all it needed was turquoise chevron to make it purrrty? Let's take a closer look at the quilt my loverly sis made.... (big sigh, followed by huge smile) I mean first turquoise, but then she edged it with a fun chartreuse folks! S. T. O. P. IT! It's too good.....


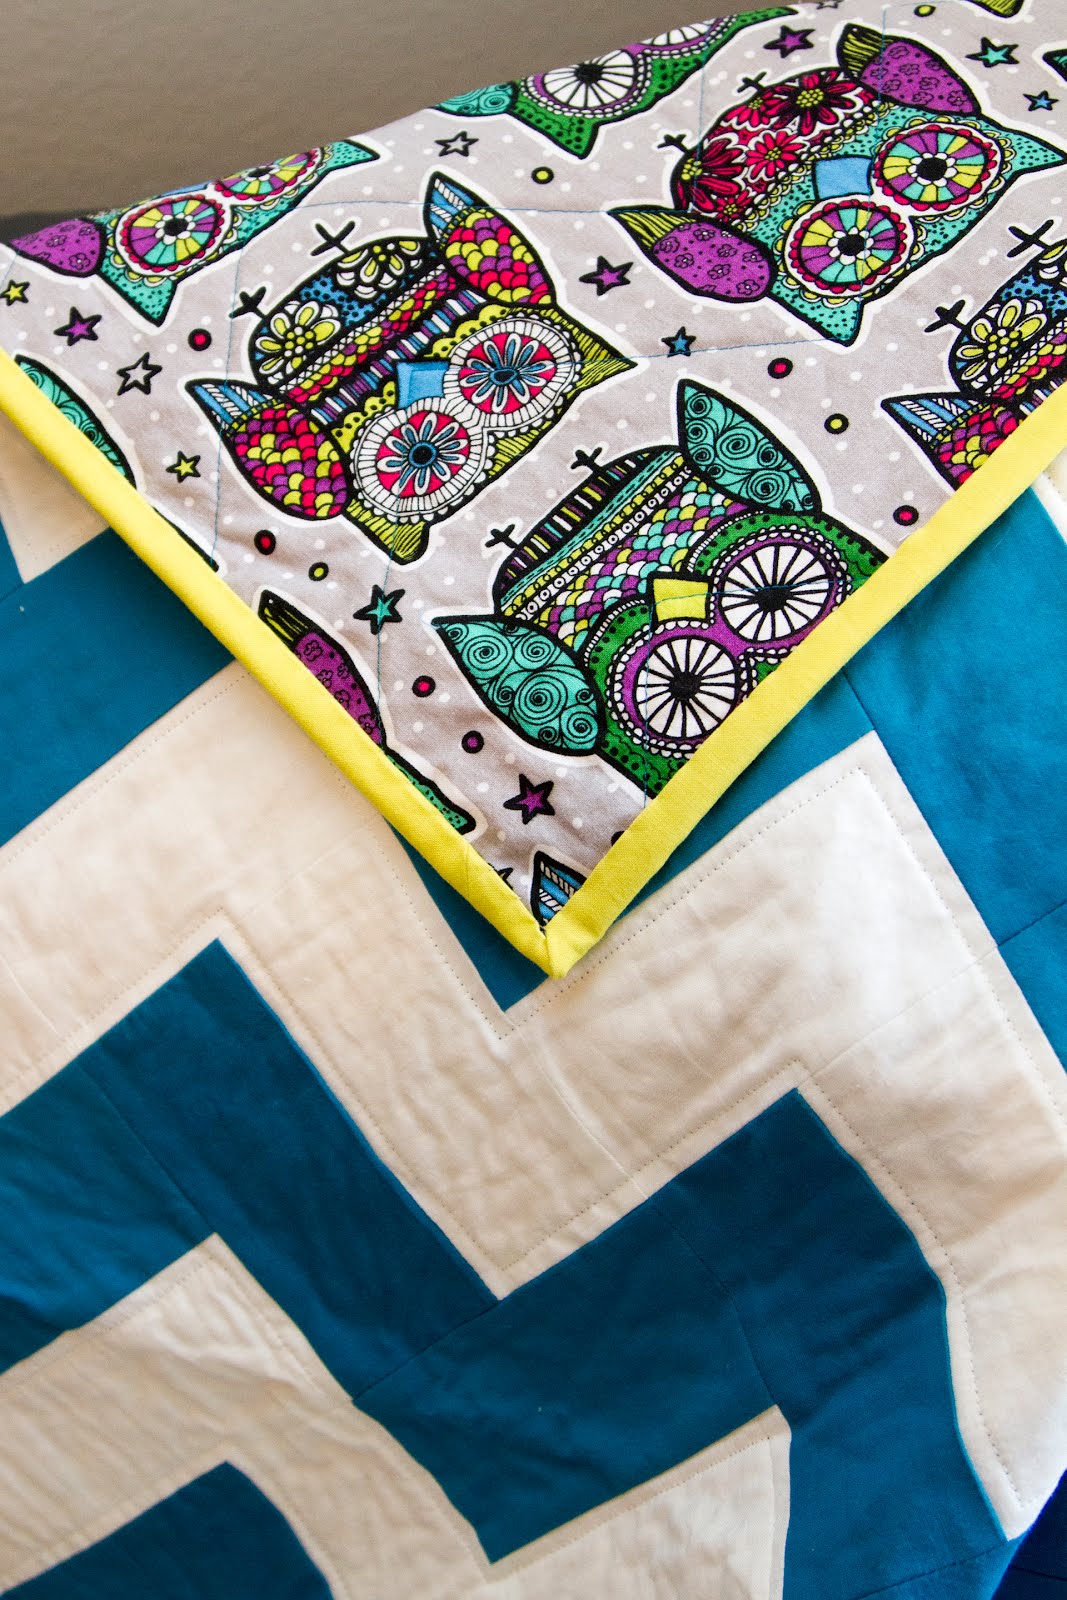
As if that didn't make your heart pitter patter enough...... then come the owls!


Who00 (get it? Whoo Whoo? My jokes bring down the house with 2nd graders!) needs a boring backside of the quilt when you can have these funky little creatures to smile at! I'm super sorry Mandy I opened my birthday gift way early, but I can't possibly put it away and pretend I didn't see it! I'm just too happy! Love is not a strong enough description. More like stalker obsessed with my quilt! Don't be surprised if I find a way to wear it as an accessory. I'm thinking wrapping it around like a sweater adding a skinny yellow belt and finishing it off with ruffly flats..... perfect!

I'm linking to these fabulosa sites:
Blue Cricket -sorry can't find her button


Pinterest Project

I did it folks. I actually made something I pinned. Can you believe it? Maybe pinterest is more than just eye candy? I actually made this project back in December, but it was missing something. I needed a Spring-ier wreath on my front door so decided to pull this out from the closet. It's still missing something, can't decide what it is though. Maybe you can help? What does it need?


Needs some flair huh? Little too boring for me. I'm thinking pom poms or a banner or more flowers. My door is quite tall and wreath holders never hang at the right level. My little sister taught me this trick and maybe it's obvious to you, but in case you're as blonde as me, hang your wreath with ribbon! I used 3 flush thumb tacks at the top of the door and folded the ribbon before tacking it down. That way there were no raw edges rubbing. There's no ugly ribbon strands on the other side of the door. It was so simple- not sure why I hadn't thought of that years ago! Plus- those 3M sticky holders were gumming up my door and always falling off. Since my door was recently painted- I couldn't have that!


I'm pretty sure my pinterest to actual project completion ratio is now 1 to 813. Not too shabby! :)

Tuesday, May 3, 2011

Mother's Day Gift Idea

****Warning****Mom, if you're reading this AVERT YOUR EYES! Atleast til Sunday!

Mother's Day leaves me stumped every year. What can I possible give my mother to show my gratitude for the insane amount of work she did raising 7 children? All the laundry that I threw down the 3 story laundry shoot (it was fun to throw things/siblings down that thing) that weren't really dirty, just too lazy to hang up. I shudder at how much laundry she did. All the meals she painfully prepared (and they weren't the heat up a frozen lasagna & pillsbury rolls dinners). These were gourmet, by ANY standards. Fresh fruit? Always! Fresh baked rolls & bread? What? You didn't have that? Oh, I thought that was on every dinner table. Fresh baked pies? Atleast twice a week. Fresh cookies or brownies? Um, daily! Lasagnas, chicken pot pies, Homemade chicken noodle soup, enchiladas, stir fry's. EVERY SINGLE NIGHT. We never ate out. We never had store bought frozen dinners. She never asked us what kind of cereal we wanted for dinner, like I may or may not have done on occasion. What I didn't realize until I became a wife and mother is how much time, planning and talent it takes to pull off this amount of work! And how incredibly thankless it is! I'm stumped mom, why did you do it? It couldn't have been because you had children who appreciated any of it! We just assumed that's how everyone lived.

Now that I'm a mom of 3. My standards are getting lower and lower. Dinners are complete in 20 minutes prep time or it's cereal. Dessert? No way, unless it's icecream or left over Easter candy. Yes, I was raised well but came up lazy when it comes to the insane amount of work I'm willing to sacrifice for my children who won't notice for another 20 plus years! So in order to thank my mom for the amazing dinners we had & she would still make me if I lived closer. Oh, how I wish we lived closer! My sister & I decided to make these fun napkin rings. My mom still throws fun dinner parties and we thought it would be fun to jazz up her table setting with something interesting. A conversation starter.


I wish I could take credit for coming up with this fun idea, but I'm pretty sure every idea has been taken and I'm happy to recreate the genius ones, like this. Renee and I found these forks at Canton flea market and we knew just what to do with these. This amazing blog, a brooklyn limestone, gave me the idea and here's my take on recreating it.

Step 1: Make a mold guide. Use a pipe or in our case different socket to round the handles. My husband drilled the sockets into wood and clamped down the wood to the counter. You could use any plumbing pipe. We tried two different sizes but ended up using a 1.5 inch pipe, roughly.

Step 2: Stamping the forks with the word EAT. We should have done this before rounding the forks but it worked in the end. We purchased a metal stamping set for around $10 at Harbor Freight.


Step 3: Darkening the letters. This is where I tried using a sharpie to fill in the stamped EAT word. It makes the word pop a little more. I had a hard time wiping off the excess sharpie on the fork though. That's when I remembered my scrapbooking trick. I wiped on craft paint, shoving paint into the crevices & wiping off the excess. Worked perfectly!


Step 4: Using your mold, guide the fork handles around the pipe using clamps to hold onto the fork and a hammer to make it smooth.


Step 5: Wrap them up with a cute set of napkins and wash away the years of resentment that your mother SHOULD have towards your incredibly unhelpful self. But because she's your mom & she used up all her mental capacity raising you during your teens, she's (hopefully) already forgiven you. Because you're 30. And you've moved out of her house. Hopefully. And if not, she still really likes you and finds you incredibly thoughtful & talented & stand up comedy worthy. Yeah, mom's are like that. One minute you've caused them complete and total public humiliation. The next minute, you can do no wrong....... I think remembering Mother's Day is the least I can do. I wish I could prepare a nice meal to go along with this, but let's be honest, her cooking skills didn't rub off on me.

Wednesday, April 13, 2011

Only slightly creepy

So, have I mentioned it's cold in Idaho? Um, yeah. Yesterday was 52 degrees with only 8 mph winds. Heaven! You've never seen me happier than I was walking my dog and the boys yesterday. Being cooped up in the house all winter has forced us to be a bit creative and has me thinking of ridiculous party ideas. Hubby's birthday is next month, and in order to follow with my awesome party theme (that I'm not going to tell you until I post about the whole party) I made this piƱata. It's supposed to be the hubby, BTW, not a lumberjack with shorts. I think his friends will have an awesome time beating him up:) I'll be happy to be behind the video camera laughing hysterically.

As you can imagine, this was a labor of love. I used a couple diaper boxes to construct the body and the head and I duct taped it all together pretty well. I did remember to put a bent metal hanger in there (with plenty of duct tape) so I could hang it up in back. The arms and legs are rolled up newspapers. The shoes are small blown-up balloons and the hands are rubber gloves filled with shredded newspaper. Then I paper mache-d the entire thing ala 4th grade with your regular flour/water/newspaper method. I love it. It dries like a rock. Then I just mixed up some paint to resemble skin color and used tissue paper for the beard, shirt, and shorts. FYI, hubby wouldn't be caught dead in jean shorts, but I think his corpse looks good in them. I did have to include his favorite shirt that I made for him here, so people knew it was him.

Anyway, I'm pretty happy with how he turned out, and more importantly, hubsters thinks it's hilarious. Whew, glad it's done. Time to move on to the next party planning project...
TO BE CONTINUED....

Sunday, April 3, 2011

Look Ma! I'm finished!!!

Well, I finally got a little nesting finished, good thing the baby's only FOUR months old now! Ha. My mom came to visit me way, way back in September and I came up with this brilliant idea to make a random quilt for Zeke's big boy bed. Turns out "random" also translates into "ridiculously difficult to accomplish." I'm used to making quilts with patterns to follow, but we just made this up as we went. Thank goodness mom was there to tell me what to sew together otherwise this would still be sitting in the bottom of my to-do box. But we did finish the top back in September and then I got it all ready to hand quilt and my motivation suddenly stopped- for about 6 months while it sat in the corner. Back before I had kids I used to sit and hand quilt all the time while I watched tv. Now when I sit in front of the tv, I'm either nursing, folding laundry, or dusting furniture. Life has changed for me a bit. So I gave up the idea of hand quilting this puppy and sent it off to be machine quilted. I used to be a bit of a machine quilt snob and looked down on anyone who didn't hand quilt. But let me tell you, I initially had some conditional love for this quilt...the condition was that it needed to look good when it was all finished because I was nervous of how random it looked when it was first pieced. But I was ECSTATIC when I saw it all machine quilted. This lady put a whole lot of work into this thing and it shows. I absolutely love it. Granted, it is the most expensive quilt I've made when you add in the price of machine quilting, but I really think it's a quilt Zeke will love for a long, long time. I mean, seriously, who doesn't love something with their name on it? A couple pics on the bed. I totally love the striped fabric on the back- good find mom! Just so we're clear here, this, is an alien. It is NOT a frog. Thank you. I just love the "smoke" that she quilted into my spaceship and the "USA" definitely makes it look less like a fish.:) Seriously, I think I'm in love. Either that or I'm confusing love with the feeling of accomplishment that I finally got this project DONE! Now I need to work on a sham to match. Hopefully that won't take 6 more months...
Linking up here:

Making


The Girl Creative


Photobucket


Monday, March 28, 2011

Easiest magnet board ever....

You know how some bloggers out there totally make it sound like refinishing an armoire was a 3 hour project? Or reupholstering a chair could be done during the baby's nap time? Of course while doing these massive projects, somehow they (other bloggers) appear to have perfectly dressed children, immaculate homes and gourmet meals on the table every night. So you think to yourself, "heck, I could paint may kitchen cabinets." But when you try to accomplish it yourself you run into massive problems. So then you spend 5 days (more like 2 weeks in my case) trying to fix all the things that went wrong, spend more money buying more products to repair the damage that you may or may not have caused in your little "freak out tantrum" (that you may or may not have had). And when it's all said and done, you have finished a very large plate of brownies by yourself (I would never do such a thing) just to make yourself feel a little better, for a project that you, in the end, wish you had never started and don't really care for the finished product either! Just so you know, I'm not that nice of a blogger. I can't really sugar coat all the problems I have when starting a huge DIY project, I just sugar coat myself in chocolate as a reward afterward! So when I say this was the EASIEST PROJECT EVER, I mean it. Here are the supplies I started with: Mod podge & foam brush, heavier scrapbook paper & metal sign. (mine was from Hobby Lobby found in the garden section) First cut the paper to the size of the metal sign. Next, place a thin layer of mod podge on the metal and a small coat as well on the paper. Lay the paper down and smooth out the wrinkles. Make sure the edges have been glued down securely. Let it dry completely. Add a layer of mod podge to the top after it's dry for extra protection. I made easy magnets from stickers from K&Co and small magnets I already had. The stickers are self adhesive so no additional glue is necessary, but I added a little bit of hot glue just for added durability. Add ribbon (or pom poms in my case) if you want to embellish your sign and hang it! I hung this on the outside of my daughter's room so I could place personal messages to her. She loves it!
This would also be a really inexpensive birthday gift for a child's party. The metal sign was only $2.99 at Hobby Lobby so the whole project under $5. Match their room colors, add a photo or a birthday card and you just won yourself Cutest Gift award!

Thursday, March 24, 2011

M's room reveal!

Finally! I finished M's bedroom. You might remember that this bedroom redo was a Christmas gift. Pathetic to take so long, I know. When it comes to decorating I'm a "big picture" kinda girl and get lost in the details. So Christmas morning came, the furniture was in, the bedding & drapes were all there, the room was painted. And then, nothing. Blank walls, no accessories. Accessories are what finish the room & I'm at a loss when it comes to deciding what to use and where. I want everything to have meaning, especially in my decor or it just feels like clutter to me. I like bold "punches in you the face" wall art, I like people to go "what the heck, where'd you find that?". I'd like to be a decor rebel because its the only place in my life where I have rebelled. So I end up getting stuck in every room I do and then gradually add the "clutter" that glams up the rooms. With that said, the room is finally finished and little M couldn't be happier. (holding my breath that she doesn't change her mind on colors in 6 months like I would) Get ready for a super long post. The BEFORE shot.....


And the AFTER shots.... The sparkly white chair she asked Santa for. Santa couldn't find sparkly but furry works right? Clipboards with modge podged scrap book paper to hold her notes, pictures, jewelry and clips. This girl knows accessories, I think I need a lesson..... A 30x40 canvas I painted the same color as the pink wall. Then handpainted lighter pink polka dots. I had my sister Renee print me my favorite quote in white vinyl. Just so you know, vinyl lettering and canvas don't play nice with each other. Applying the letters wasn't the funnest, but I love it now! I cut out birds from scrapbook paper and applied to the wall with glue dots. The girls even helped cut out the birds. The wall just makes me happy, the picture however, does not do it justice. Have you ever tried to take pictures with a glaring hot pink wall? And to top it off, the window has turquoise curtains that really change lighting!


Here's a closer shot of the modge-podged clipboards. They come in handy for all her artwork and notes too! The dresser my husband painfully painted and repainted and then I distressed it with minwax gel stain. I love the glass knobs from Hobby Lobby. Here's the before- And here's a close up After shot:


Here's a close up of the polka dots. Originally I thought about painting them. Then, realized how skee wompus (sp?) they'd be. I also thought about vinyl, but realized that could be pricey. Next solution, and easiest!, was with cardstock. I found a thick, shiny white cardstock and cut them into 12" circles. Next I used 3M spray adhesive to apply. So easy and inexpensive. Total cost for the wall was $13.


This blog here gave me the idea for the poofy mobile, but I couldn't find her actual post, dangit, her blog is really good though. I made tissue pom poms and bought paper lanterns. The bedding was all purchased from Target. The side table and furry chair were from Pottery Barn. Break down of the room, don't really want to add it up, but I'm always wishing other bloggers would so here goes:


Bedding from Target- $90, new bed from a boutique only $200. Paint including oil based for dresser $140. (ouch that seemed high, but I double checked) We paid painters to paint the room since it was right before Christmas for $120. Cardstock for polka dots and clipboards, $14. 3M glue, $4. Clipboards, $6, I had 3 already. Table from PB teen, $40. Furry chair, on sale $80. Grand total is $694. But we could've saved $120 if we painted ourselves. $120 seems very reasonable after painting that dang dresser though! So there you have it. A complete makeover. I think it's the first room (besides bathrooms) in my house that feel done. Wow, I don't know what to think of that!


I've been featured on this great site!


Linking up to these great sites:


All things bright & beautiful


Tip Junkie handmade projects

Miss Mustard Seed's Creative Blog


Get Your Craft On Tuesday